
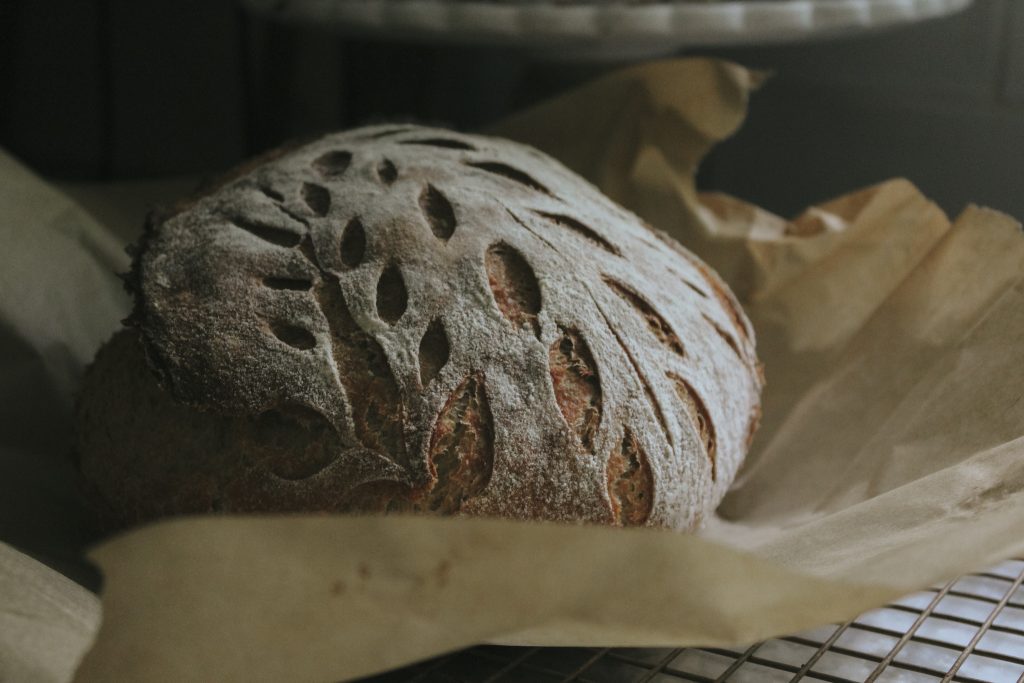
A well-loved recipe for a classic sourdough boule. This sourdough boule recipe has the perfect combination of crusty exterior and soft, bubbly interior! Flour, water, sourdough starter and salt are combined together, fermented, and baked in a Dutch oven to make a lovely sourdough boule!
This post may contain affiliate links, please read our privacy policy for details.
When I first acquired a sourdough starter, I leaned into muffins, pancakes, waffles and sweet breads since I was used to baking. But, the classic sourdough boule felt like another beast. The steps, the timing, it felt like a lot. After a few months of practicing brad making, I realized the process of trial and error is essential to bread making, especially the errors part ha! Each time something unfavorable happens, it actually provides inside into what went wrong or rather, what can be improved upon. Every time I messed up, I gained a helpful lesson that improved my bread the next time. I say this to encourage you to just jump in! You don’t have to have it all figured out before even starting. It’s a learn as you go kind of thing.
Thankfully, these days, there are plenty of resources online for making sourdough bread. I learned the bulk of my sourdough skills from reading blogs for tips and watching videos of shaping techniques. I’m grateful for these resources and I’m SO glad I took the leap to learn sourdough bread. The ability to make bread for family and loved ones is such a gift!
If you have the opportunity to learn from a friend or attend a workshop, I highly recommend it. There’s nothing like learning a new skill from someone in person, one-on-one!
No longer do you have to rely on store-bought bread. A few simple ingredients, tools & techniques is all it takes!
Ingredients you need for this recipe:
- sourdough starter
- bread flour
- water
- fine sea salt
Ingredient Details:
- Sourdough Starter: I recommend getting an established starter from someone if you’re able to! I got my starter from my mother-in-law (thanks Grammy!) and now I have a living piece of family-cooking right in my fridge! Getting a live, active starter from someone means you can start baking with it right away and I think it’s special to get one from somebody local so they can help you on your sourdough/bread making journey. My suggestion is to ask around if you don’t have a close friend or family member with one. Someone in your community is bound to have a starter they are happy to share. If you are local to middle TN, I would be happy to give you some of mine, just reach out to me!
- The sourdough starter needs to be bubbly and active to get the best rise on the dough. This is typically within 4-8 hours of being fed equal parts flour and water. I like to do the float test to make sure my starter is active and ready to make bread. Float test: scoop a small, almond sized amount of starter out of the jar and drop it into a cup of water. If dollop of starter floats, it’s ready to use! If the starter sinks to the bottom, it either needs a bit longer to become more active or is past its peak activity and needs to be fed again before using. Pay attention to the amount of time between feeding the starter and its peak activity (height & bubbles). Record this timing to help you plan for your bread making!
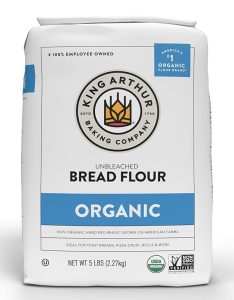
- Bread Flour: King Arthur bread flour, Costco brand flour, or any high protein organic flour
- Water: Filtered water is important here! Room temperature/warm water works great in sourdough recipes to help boost the rising of the dough. I often heat filtered water in my kettle for 30 seconds to a minute before it gets hot/boiling to use when making bread. Filtered water straight from the fridge will work too, I just like the added boost of the warm water.
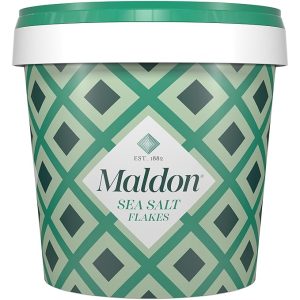
- Salt: For the salt, I love using Maldon Sea Salt flakes. This salt is so light and delicious. It works really well in bread but I also using it as a finishing salt on just about everything, especially with proteins! When I use Maldon salt in bread recipes, I grind the flakes into a finer texture in my mortar and pestle. It’s an extra step but it’s so fun and satisfying to do and it produces the most perfect fine sea salt for sourdough bread! I buy Maldon Salt in bulk on Amazon because it’s better deal and I go through it quickly. I believe they sell the small boxes at Whole Foods as well.
Shop the Tools:
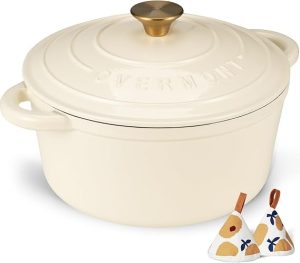
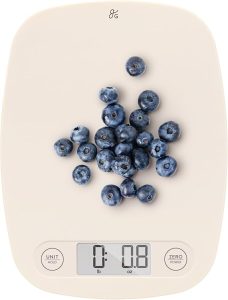
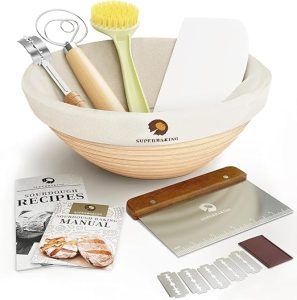
These are the tools I use for making a classic sourdough boule. I would consider these items sourdough essentials. They each have a purpose in the process. I collected my whisk, bowls, scrapers and baskets separately overtime but I found a sourdough bread set on Amazon that a friend of mine recently purchased and loves. I wish I would have known about when I started because it has all the tools you need in one convenient package! I do recommend using a food scale for sourdough bread baking. You can get away without but from my own experience, bread making has gone much smoother since I started weighing my ingredients. It produces the most reliable result which is important when you are putting this much time into something. The kitchen scale I use is affordable and works great.

Learning to Make Sourdough Bread
Turns out making sourdough bread isn’t necessarily hard, it just requires attention, like most fruitful things. Factors like humidity, timing and temperature all come into play when it comes to bread making. The neat thing about bread making is that over time you’ll learn how these factors effect the final product and you can adjust as necessary to get your bread exactly how you want it. Over the years, I have adjusted my boule recipe and techniques from trial and error. The classic sourdough boule recipe below is one I make for my family weekly. We eat it with a slab of butter, the perfect side to just about anything! Wholesome, delicious and incredibly satisfying.
If you are wanting to confidently make a sourdough boule with your own two hands, whenever your heart desires, I hope sharing this process helps!
Recipe Tips
Preheat Dutch oven: When the dough is in its final proofing stage, preheat the Dutch oven. Getting the Dutch oven super hot before even placing the dough inside will help develop that incredible crust.
Big bowl: Use a big bowl to allow plenty of room for the dough to rise. The big ceramic bowls are my favorite.
Parchment paper: This helps tremendously with moving the boule in and out of the hot dutch oven, a must for successful transfer!
Note: I’ve included several tips on the recipe card below! There are tons of helpful techniques in the world of sourdough bread making – I’ve shared the ones I find most helpful in the recipe below.
Lastly, if you make this Classic Sourdough Boule recipe, please let me know down below by leaving a comment and review! I love to hear from you guys. It’s so fun to share food stories & cook these recipes together. Also, snap a photo of your finished dish and share it with me on Instagram – tagging me @saltedseasons. It makes my day seeing what y’all are whipping up. Cheers to handmade meals!
Love y’al
– Țaylo
Classic Sourdough Boule
Ingredients
- 100 g active, bubbly sourdough starter
- 350 g room temperature or slightly warm water
- 500 g bread flour
- 12 g fine sea salt
- * see recipe notes below for ingredient details and tips
Instructions
- In a large bowl, combine active sourdough starter and warm water, whisk vigorously until bubbly (Danish whisk works great for mixing starter & water).
- Add flour and salt, use whisk to combine then switch to using your hands and knead for a minute or so until dough comes together.
- The dough will be a little shaggy looking and weak. Cover the bowl and let the dough rest for 30 min for the autolyse period so the water has an opportunity to hydrate the dough. This resting period changes the consistency of the dough and makes it much easier to work with!
- Next, wet hands with water and perform the first fist series of stretch and folds. I like to perform a minimum of 3 series of stretch and folds 30 min apart before the bulk fermentation where you let the dough do its thing and rise. The stretch and folds are what helps to create those beautiful bubbles in the bread! For the stretch and folds, picture a compass with the four directions. You will take the dough from each cardinal direction and stretch it upwards as far as it’ll go and punch it back into the middle of the dough. (1 series = 4 stretch and folds – one for each cardinal direction). Perform first series of stretch and folds. Cover the bowl of dough well with wrap or a lid and let rest for 30 minutes.
- Perform the second series of stretch and folds, cover and rest for 30 min.
- Perform the third series of stretch and folds. Cover the dough and let it bulk ferment for 8-12 hrs at room temperature. If it's a colder season, choose a warm spot in the house.
- When the dough has about doubled in size, is domed over with bubbles underneath the surface, the dough is ready to be shaped. To shape, wet your hands and remove dough from bowl onto counter space. For shaping, I like the envelope and roll-up method. To do this, first, stretch the dough on the counter into rectangle, fold the two shorter sides into the middle like you would a letter for the mail, then roll it up. Push and pull the dough on the counter to form a rounded ball shape.
- Let the shaped dough sit on counter uncovered for 30 minutes.
- Perform any final shaping needed by pushing and pulling the boule on the counter.
- Lightly flour a towel or liner of a banneton basket and plop the dough top side down into the bowl. Cover and refrigerate for at least 30 min. This refrigeration time helps firm up the dough for better scoring. You can also leave the dough in the fridge for awhile longer if you would rather bake it later in the day.
- Preheat oven to 450°F with Dutch oven inside.
- Plop dough onto middle of parchment paper after 30 minutes of resting time in the fridge.
- Rub a bit of flour over the top surface of the boule and score (make cuts into the dough using a razor). Make sure you have at least one large, deep score somewhere on the boule to allow steam to escape.
- Pick up the boule by the parchment paper and place it into the Dutch oven. Cover with lid. Bake for 30 minutes.
- After 30 min, remove lid and bake another 20ish minutes until top is golden brown. You can bake it an additional 5-10 minutes longer if you prefer a darker crust.
- Remove the boule from Dutch oven by grabbing edges of parchment paper. Allow the boule to cool on counter or on wire rack for at least 45 minutes before slicing. The bread will continue baking as it cools, so don’t slice into it right away or the inside texture may end up gummy!
- Enjoy that beautiful, delicious sourdough bread!!!! I'm proud of you for getting to this point!
Notes
I hope you enjoy this recipe that has become a well-loved favorite here at Salted Seasons— where we celebrate seasonal eating and down to earth living. Thank you for being here and thanks so much for cooking with me! Until next time—
811464 890025Real informative and great anatomical structure of subject material , now thats user pleasant (:. 182293