
A hearty, slightly sweet, oat crusted sourdough bread. This is our family’s favorite breakfast bread. Butter it as toast, add your favorite jam or use it for breakfast sandwiches! The flavor and texture is everything you want and need in bread, trust me.

This post may contain affiliate links, please read our privacy policy for details.
Ingredients you’ll need:
- active, bubbly sourdough starter
- water
- raw local honey
- high quality salted butter melted
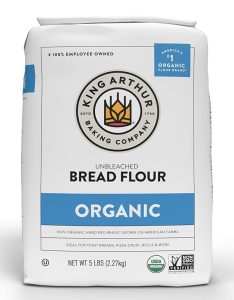
- high quality all-purpose or bread flour
- high quality whole wheat flour I prefer freshly milled flour made from soft white wheat, spelt or einkorn berries
- organic rolled oats plus a bit more for crust
- fine sea salt I prefer hand-grinded Maldon Sea Salt
- * see notes on full recipe below for more ingredient details and tips

Why you’ll love this Honey Oat Sourdough Bread:
- hearty
- wholesome
- the perfect base for butter or jam
- healthy minerals and fiber from the whole wheat and oats


Shop the Tools
These are the tools I use for making any sort of classic sourdough boule. I would consider these items sourdough essentials. They each have a purpose in the process. I collected my whisk, bowls, scrapers and baskets separately overtime but I found a sourdough bread set on Amazon that a friend of mine recently purchased and loves. I wish I would have known about this set when I started because it has all the tools you need in one convenient package! I do recommend using a food scale for sourdough bread baking. You can get by without it but from my own experience, bread making goes a lot smoother and is more predictable when I weigh my ingredients. Weighing ingredients is much more accurate compared to filling measuring cups and produces the most reliable result, which is important when you are putting this much time into something! This kitchen scale I use is affordable and works great.


What to Make with Honey Oat Sourdough Bread
We love using this bread for:
- toast
- french toast
- breakfast sandwich
- blt’s
- side with soup
- garlic bread to pair with dinner
- to make delicious garlic bread: butter cut slices of bread, toast in oven at 425°F until golden, then rub with a fresh garlic clove and sprinkle lightly with Maldon flake salt

If you make this Honey Oat Sourdough Bread, let me know down below by leaving a comment and review! I love to hear from you guys. It’s so fun to share food stories & cook these recipes together. Also, take a picture of your bread and share it with me on Instagram – tagging me @saltedseasons. It makes my day to see what y’all are whipping up. Cheers to handmade meals!
Love y’al
– Țaylo
Honey Oat Sourdough Bread
Ingredients
- 100 g active, bubbly sourdough starter
- 350 g room temperature or slightly warm water
- 40 g raw local honey
- 3 tablespoons high quality salted butter melted
- 300 g high quality all-purpose or bread flour
- 150 g high quality whole wheat flour I prefer freshly milled flour made from soft white wheat, spelt or einkorn berries
- 50 g organic rolled oats plus a bit more for crust
- 10 g fine sea salt I prefer hand-grinded Maldon Sea Salt
- * see recipe notes below for ingredient details and tips
Instructions
- In a large bowl, combine active sourdough starter and warm water, whisk vigorously until bubbly (Danish whisk works great for mixing starter & water). Add honey and melted butter, whisk again.
- Add flours, oats and salt. Use whisk to combine initially then switch to your hands and knead until dough comes together.
- Cover the bowl and let the dough rest for 30 min for the autolyse period so the water has an opportunity to hydrate the dough. This resting period changes the consistency of the dough and makes it much easier to work with!
- Next, wet hands with water and perform the first fist series of stretch and folds, then let the dough rest for 30 minutes. Preferably, I do a minimum of 3 series of stretch and folds 30 min apart before the bulk fermentation where you let the dough do its thing and rise, but sometimes all I have time for is 1 or 2 series of stretch and folds. It will turn out great either way! The stretch and folds are what helps to create the beautiful rise in the bread, so do them if you have the time.
- For the stretch and folds, picture a compass with the four directions. You will take the dough from each cardinal direction and stretch it upwards as far as it’ll go and punch it back into the middle of the dough. (1 series = 4 stretch and folds – one for each cardinal direction). Perform first series of stretch and folds. Cover the bowl of dough well with wrap or a lid and let rest for 30 minutes.
- Perform the second series of stretch and folds, cover and rest for 30 min.
- Perform the third series of stretch and folds. Cover the dough and let it bulk ferment for 8-12 hrs at room temperature. If it’s a colder season, choose a warm spot in the house.
- When the dough has risen about 50% and is domed over, the dough is ready to be shaped. To shape, wet your hands and remove dough from bowl onto counter surface.
- For shaping, I like the envelope and roll-up method. To do this, first, stretch the dough on the counter into rectangle, fold the two shorter sides into the middle like you would a letter for the mail, then roll it up from the other end like a burrito. Push and pull the dough on the counter to form a rounded ball shape.
- Let the shaped dough sit on counter uncovered for 30 minutes while the oven preheats.
- Preheat oven to 475°F with Dutch oven inside.
- Perform any final shaping needed by pushing and pulling the boule on the counter. Get a piece of parchment paper ready for the boule to bake (You can also put the dough covered in the fridge at this point if you would rather bake it later in the day). When ready to bake, sprinkle some rolled oats onto a plate. Wet your hands and gently rub water on top of the boule to wet the surface (will help oats stick). Pick up the boule and dip the top portion of the dough into the oats, making sure to coat the top crust as evenly as you can. Flip dough back over and set on the piece of prepared parchment paper. Score the bread (scoring is making cuts into the dough using a sharp razor). Make sure you have at least one large, deep score somewhere on the boule to allow steam to escape. I typically do a large, deep score closer to the bottom edge of the round and another deep score straight down the middle on top. Deeper, simpler scores work great for the oat crust.
- Pick up the boule by the parchment paper and place it into the Dutch oven. Cover with lid. Bake for 30 minutes.
- After 30 min, lower the oven temperature to 450°F, remove the dutch oven lid and bake another 18-20 minutes until top is golden brown.
- Remove the boule from Dutch oven by grabbing edges of parchment paper. Allow the boule to cool on counter or on wire rack for at least 30 minutes before slicing. The bread will continue baking as it cools, so don’t slice into it right away or the inside texture may end up gummy!
- Enjoy your beautiful, honey oat sourdough bread!
Notes
I hope you enjoy this recipe that has become a well-loved favorite here at Salted Seasons— where we celebrate seasonal eating and down to earth living. Thank you for being here and thanks so much for cooking with me! Until next time—
—Taylo
Keepsake Recipe Card
I enjoy baking most when I have my recipe card laying out in front of me and I can put my phone away. I hope you enjoy this printable recipe card!


Note: To print, right click on recipe card, save image & print at home. These cards are formatted 4 x 6 inches.